Barbell Hip Thrust: Form, Muscles Worked, and Programming
Master the barbell hip thrust with evidence-based form cues, foot placement, and a programming framework for stronger, more developed glutes.
Medical Disclaimer: This content is for informational purposes only and is not a substitute for professional medical advice. Consult a qualified healthcare provider before starting any new fitness or supplement program.
In this article
Few lifts target the glutes the way the barbell hip thrust does. This guide covers the form cues that actually matter, the muscles being trained, the variations worth learning, and an actionable programming framework.
What Is the Barbell Hip Thrust?
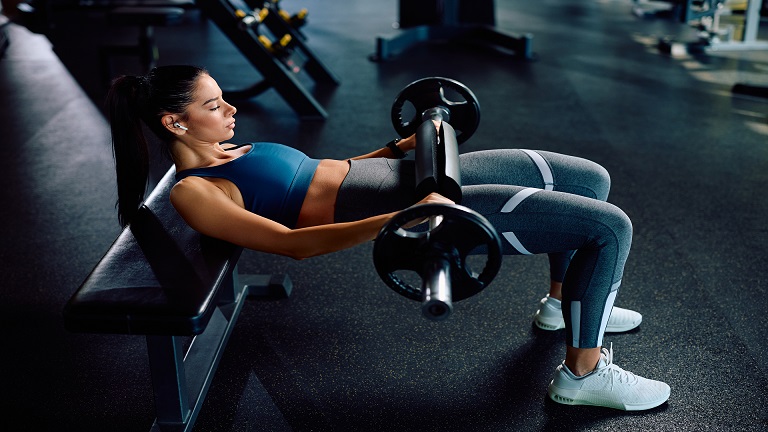
The barbell hip thrust is a hip extension exercise performed lying supine with the upper back and shoulders elevated on a bench, a loaded barbell across the hip crease, and the feet flat on the floor. The lifter drives through the heels to extend the hips upward until the body forms a straight line from shoulders to knees, then lowers under control.
It belongs to the broader hip extension family along with deadlifts, Romanian deadlifts, and glute bridges. Among these, the barbell hip thrust is the most direct way to load the glutes without the lower back, hamstrings, or quads taking over. As a compound back-and-hip builder, it earns its place as a primary glute movement on lower body day.
Muscles Worked by the Barbell Hip Thrust
The primary movers are the glutes (especially the glute max) and the hamstrings. The glute max performs the actual hip extension; the hamstrings assist, especially as the bar approaches lockout.
Secondary muscles include the quads (knee stability throughout the rep), adductors (medial thigh engagement during the drive), and the core (anti-extension stabilization to prevent the lower back from arching). The result is a lift that looks like glute isolation but recruits the entire posterior chain when performed correctly.
How to Perform the Barbell Hip Thrust
Setup
Position a flat bench against a wall or rack so it cannot slide backward under load. A standard flat bench (around 14 to 16 inches tall) works for most lifters. Sit on the floor with your upper back against the bench edge so your shoulder blades rest on the padded surface.
Roll a loaded barbell over your legs until it sits in the crease of your hips. Use a thick bar pad as standard thin pads will dig into the hip bones at heavier loads and may cause pain and bruising.
Place your feet flat on the floor, shoulder-width apart. Foot position matters more than most lifters realize. The goal is for your shins to be vertical at the top of the rep, which dictates how far in front of your glutes the feet should start. Feet too close to the glutes shifts emphasis toward the quads. Feet too far forward shifts emphasis toward the hamstrings and reduces glute drive.
Grip the bar with both hands wider than your hips for stability. Tuck your chin to your chest, brace hard, and pull your ribs down toward your hips before the first rep. The bench-against-wall setup is the safe default, as the bench sliding backwards mid-set is an easy way to get injured.
Coming Up
Drive through your heels, not your toes, extending the hips upward in a single explosive motion until your body forms a straight line from shoulders to knees.
At the top, tuck your pelvis under (posterior pelvic tilt) and squeeze the glutes hard for a brief pause. This is the position where the glute max contracts hardest.
Critical cue: do not look up at the ceiling. Keep your eyes forward or angled slightly down toward your knees. Looking up forces the cervical spine into extension and pulls the lower back along with it, which is the most common cause of lower back pain on this lift.
Going Down
Lower the bar under control over 1 to 2 seconds back to the starting position. You have two options. Touch-and-go reps keep the hips hovering just above the floor between reps, which is the standard for hypertrophy because it maintains time under tension.
Full-reset reps return the hips fully to the floor between reps, which is useful for heavy strength work or when fatigue starts breaking down form. Pick one based on the goal of the set.
Common Form Mistakes (and How to Fix Them)
Lower back hyperextension at the top: The body should form a straight line at lockout, not an arch. Fix: tuck the chin to the chest, pull the ribs down toward the hips, and finish with a posterior pelvic tilt rather than driving the lower back into extension.
Looking up at the ceiling: Almost guaranteed to cause lower back rounding into hyperextension. Fix: eyes forward or slightly down toward the knees throughout the entire rep.
Feet too far forward: Shins angle forward at the top, which puts the load on the hamstrings and reduces glute activation. Fix: shins should be vertical at lockout. Move the feet closer to the glutes until that happens.
Feet too close to the glutes: Shifts emphasis toward the quads and reduces glute drive. Fix: same as above, find the foot position that produces vertical shins at the top.
Incomplete hip extension: Stopping short of full lockout robs the glutes of their peak contraction. Fix: drive hips fully up until the body is straight from shoulders to knees, then squeeze for a moment before descending.
Bench sliding backward under load: Genuinely dangerous at heavier weights. Fix: anchor the bench against a wall, a rack, or weight plates. If the gym has a dedicated hip thrust pad or machine, use it.
Variations Worth Knowing
Glute Bridge
The bodyweight or lightly loaded version performed flat on the floor without a bench. The reduced range of motion makes it a regression for beginners or a warmup before heavy hip thrusts. Once a lifter can perform 15 plus controlled reps with bodyweight, it’s time to graduate to the full hip thrust.
Single-Leg Hip Thrust
The unilateral version, performed one leg at a time with the non-working leg extended or held off the floor. Useful for fixing side-to-side strength imbalances and as an accessory to the bilateral barbell version. Most lifters can handle 25 to 40% of their bilateral hip thrust load on each leg.
Banded Hip Thrust
A resistance band looped around the bar or just above the knees. The band increases tension at the top of the rep where glute contraction is hardest, which adds peak-contraction stimulus. Worth rotating in for advanced lifters once the basic barbell version stops driving progress.
Dumbbell Hip Thrust
A heavy dumbbell balanced across the hips replaces the barbell. The mechanics are identical, but the load ceiling is lower because dumbbells max out around 50 to 60 kg in most gyms. A solid substitute for people training at home without a barbell.
Hip Thrust Machine
Many commercial gyms now have dedicated hip thrust machines from Nautilus, Rogue, or Cybex. These eliminate the bench-and-barbell setup and provide a more stable platform. The training stimulus is equivalent to the barbell version when loaded comparably, and for many lifters the machine is actually preferable because the setup is faster and the load path is fixed.
How to Program Barbell Hip Thrusts
The hip thrust fits naturally on lower body day, either as the main glute exercise after squats or as the primary glute lift if quads aren’t the priority. It pairs well with hamstring work (Romanian deadlifts, leg curls) and core work in the same session.
For pure strength work, 3 to 5 sets of 3 to 5 reps at 80%+ of 1RM. For hypertrophy, 3 to 4 sets of 6 to 15 reps at 65 to 75% of 1RM. The hip thrust tolerates slightly higher rep ranges than most barbell lifts because it doesn’t cause as much CNS fatigue as other compounds. The fuller breakdown on rep ranges for muscle growth applies here.
Working Weight Benchmarks
Beginner: 1.0 to 1.5 times bodyweight for 8 to 10 reps. For a 70 kg (155 lb) lifter, that’s roughly 70 to 105 kg (155 to 230 lb).
Intermediate: 2.0 to 2.5 times bodyweight for 6 to 8 reps. Same lifter now hip thrusts 140 to 175 kg (310 to 385 lb).
Advanced: 3.0 plus times bodyweight for 5 to 6 reps. A 70 kg lifter at this level pulls 210 kg or more.
Progression Scheme
Once you hit the top of your rep range across all working sets, add 2.5 kg (5 lb) the following session and drop back to the bottom of the rep range. Repeat the cycle. This is double progression, and it works for beginners and intermediates through the first year or two of consistent training.
Hip Thrust Loads
Hip thrust loads progress faster than squat or deadlift loads, and lifters often find themselves moving 200+ kg on the hip thrust within their first 6 to 12 months of training. This is not a sign of advanced strength, and it doesn’t mean the squat or deadlift is being neglected in comparison.
The hip thrust is mechanically efficient by design, as it loads only one joint (the hip), has full back support throughout, requires no balance, no bar path control and no overhead stabilization.
Should You Use a Lifting Belt for Hip Thrusts?
Most lifters don’t need a belt for the hip thrust. The supine position provides natural spinal support, and the load runs through the hips rather than compressing the spine the way a squat or deadlift does. Below 2.5 times bodyweight, training beltless is fine.
At very heavy loads (3.0x bodyweight and above), some lifters add a belt for extra bracing during the brace and drive phase. The benefit is real but smaller than what a belt does for the squat or deadlift. If you’re training in that range, see our guide on the best weightlifting belt to pick one that fits your torso.
Barbell Hip Thrust vs Other Glute Exercises
Against the back squat, the squat builds total lower body strength and significantly more quad mass. The hip thrust isolates the glutes more directly. Hypertrophy research shows similar glute growth between the two over multi-week training blocks, so the smart play is to use both rather than choose.
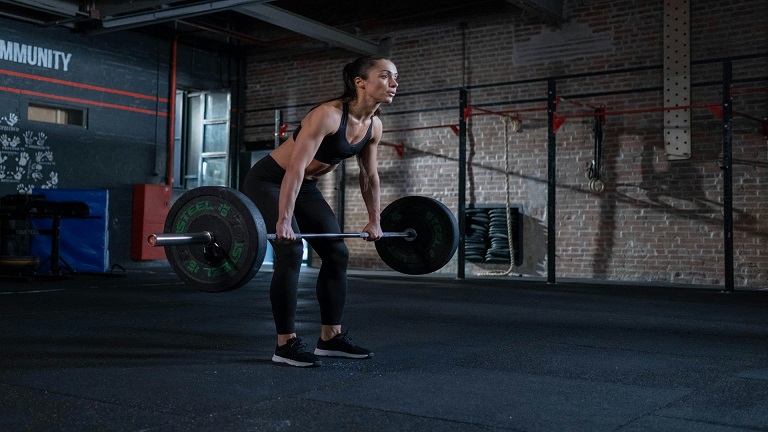
Against the Romanian deadlift, the RDL trains the glute-hamstring complex through hip flexion and emphasizes the glutes at the lengthened position. The hip thrust trains the glutes at the shortened, fully extended position. They train the same muscle through different ranges, which is why most well-designed lower body programs include both.
Takeaway
The barbell hip thrust helps build glute mass and strength, and it can be learned quickly, as its technique is not complicated and it doesn’t have high balance or mobility requirements. Overall it’s an excellent choice for lifters of all levels, so start doing it and reap the benefits.
Frequently Asked Questions
Is the barbell hip thrust safe for the lower back?
How much should I be able to hip thrust?
Should I use a hip thrust machine instead of a barbell?
How often should I train hip thrusts per week?
Do I need to do hip thrusts if I already squat heavy?
Continue reading
Barbell Bench Press: Form, Muscles, and Programming
Master the barbell bench press with evidence-based form cues, grip width guidance, and a programming framework that optimizes progress.
Dumbbell Romanian Deadlift: Form, Muscles, and Programming
Master the dumbbell Romanian deadlift with evidence-based form cues, range of motion guidance, and a programming framework for stronger hamstrings.
Barbell Bent Over Row: Form, Muscles Worked, and Programming
Master the barbell bent over row with evidence-based form cues, muscles worked, variations, and a programming framework for strength and hypertrophy.
Free newsletter
Evidence-based fitness and health insights, delivered to your inbox.
No spam. Unsubscribe at any time.
Thanks for subscribing!